


In a world of pure imagination...

While we don't have the recipe for everlasting gobstoppers or an eccentric candy man like Mr. Wonka, we can take you inside the world of enamel pin making.
Understanding what goes on inside the factory, the ins and outs of how enamel pins are made, will help you design your pin. Hard enamel pins have a different manufacturing process than soft enamel pins, so some designs are better suited for one manufacturing process over another.
Sit back for a tour into the pure imagination of enamel pin factories. You won’t find chocolate waterfalls and candy cane trees, but what goes on inside is no less magical. And we won’t even turn your children into giant blueberries.
1. Make the mold
The first step in the enamel pin manufacturing process is to turn your digital design into a physical mold. We upload the file to a machine that cuts out a mold in industrial steel.An enamel pin mold
Next, we cut off some of the excess metal around the engraved design. Repeated heating and cooling (called heat treating) hardens the mold until it is super-duper strong. This allows it to stand up to the high-pressure stamping process.
2. Stamp the design and cut out the pin
The hardened mold is loaded up into a machine that will use it to stamp the design. Pins are usually made out of iron or zinc alloy, which is softer than the steel stamping mold. The mold comes down with 5 tons of pressure, pressing the design into the plate. A separate machine punches out the pin shape.
Next, we solder on the pin backing. Ta-da! Now you have a raw pin.
That sound in the background is the satisfying stamp of a pin being born.
3. Electroplate (soft enamel pins)
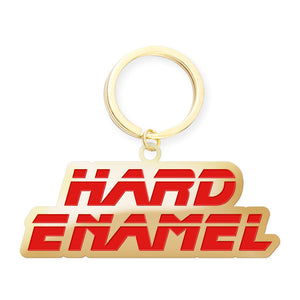
Electroplating is the process of adding an outer layer of metal, like gold or silver, to the pin base. Both hard and soft enamel pins will be electroplated but at different stages in the manufacturing process. Soft enamel pins get the electroplating before they are enameled because this is the stage where they get their final base color. Hard enamel pins are electroplated later because they get a good polish after enameling that would otherwise rub the plating off (but more on that soon).
Plating at this stage is also why soft enamel pins have more base color options. Instead of electroplating, soft enamel pins can also be color-dyed in any Pantone Matching System (PMS) color. That means soft enamel pins are the way to go if your design calls for non-metallic outline colors or an antique finish.
Time for a science lesson.
Electroplating works by running an electric current through an electrolyte solution, an anode, and a cathode. The cathode is the metal you want to be plated—your raw pin. The anode is the piece of metal that you want to end up on the pin, let’s say gold. The electrolyte solution is basically water with dissolved metal salt—it has extra ions that allow electricity to pass through. Ions are atoms with either one electron too many (positive ions) or one too few (negative ions).
When all these elements are combined, positively charged ions from the anode in the solution get stuck to the negatively charged cathode, depositing the desired metal on your pin.
Here is a very official science-y diagram of how silver (Ag on the periodic table) is electroplated onto an iron spoon.

Source
If you didn’t track that—just call it a magic metal bath. 🧙 What it looks like in action:
The pins are wrapped together in copper wire to conduct electricity through them.
4. Enamel and bake
Now for the fun part! Your pin gets enameled in glorious color. It can be done either via machine injection or by hand.
Is this machine enamel injection or ASMR? Por que no los dos?
Soft enamel pins get a thin layer of paint and are not filled up to the brim, creating a recessed look. Hard enamel pins are filled all the way up to the metal edges.
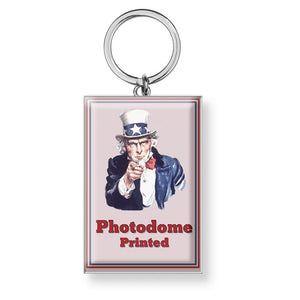
Enameling only allows for solid colors separated by the metal outlines. If your design calls for gradients, check out photodome printed pins instead.
What this means for soft enamel pin designs
Let’s recap what we’ve learned so far: soft enamel pins get their base or outline color before enameling and, therefore, have more options. The enamel is recessed. That already has some implications for your pin design—like whether you want a textured or a flat look or different colored outlines.
Kessler Baking Studio, for instance, created a pin with a raised outline color in mustard yellow. The brown line is actually recessed enamel paint.
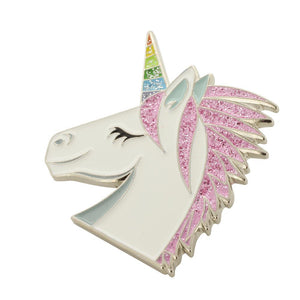
Soft enamel pins are great for showing off fine lines and details.
Left: A detailed bowl of ramen soup designed by Adam Ellis. Right: An intricate three-eyed fox by Caitlin Hackett.
After painting, the pins go in the oven to harden the enamel. Minus a final QC, these soft enamel pins are basically done, whereas hard enamel pins have a few more steps. That’s why soft enamel pins are less expensive to produce.
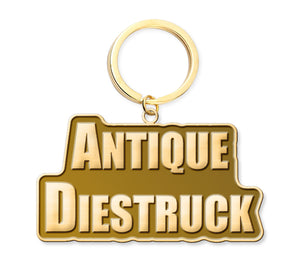
What this means for hard enamel pin designs
Since the enamel is filled all the way up, hard enamel pins will end up with flat surfaces. The outlines will be a shiny metallic color and slightly thicker than their soft enamel counterparts.
The end result feels slightly heavier and sturdier than soft enamel pins. Hard enamel pins are also more expensive to produce because of the extra steps involved. This leads to hard enamel pins having a higher perceived value.
These Doctor Who pins by Ekitai Triad Designs show off a hard enamel pin design at its finest: luxurious, glossy, and bright.
We also like this rainbow spaceship by Nancy Wiebel and these tropical plants by Cube House Jungle for hard enamel pin designs.
Hard enamel pins also head to the oven for a final bake.
5. Polish (hard enamel pins)
Hard enamel pins get polished flat to even out the surface and make sure the enamel paint and metal outlines are totally even.
This leaves them extra smooth and shiny.
6. Electroplate (hard enamel pins)
The hard enamel pins get their turn in the science bath, erm, electroplating solution. The metal molecules only stick to materials that conduct electricity, so the enamel paint itself remains its original color.
7. Screen print the details
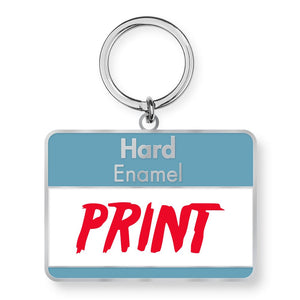
Some hard enamel pins get an extra layer of detail with screen printing. This process uses ink to draw details on top of the otherwise-complete design. This style is called Custom Hard Enamel Print Pins.
Check out the Ray Ban logo on these sunglasses. You can’t achieve that level of detail with enamel alone.

Mikey Burton used screen printing to achieve different colored lettering in this “diet water” pin.
Because it’s done manually, hard enamel print pins typically cost more.
8. Quality assurance
Every piece is carefully checked by hand to make sure you only get top-notch pin wizardry.
How are enamel pins made? With magic!
You don’t need a golden ticket to get started with enamel pins—just stroll over to the custom pins section on our website. We also have tips for designing backer cards and starting your own enamel pin business.
FAQs
What metal are enamel pins made of?
Enamel pins are typically made of metal, although they can also be made of plastic or other materials. They consist of a thin layer of enamel over a metal base.
What is a pin design?
A pin design is a graphical representation of how a pin should look. It can include the shape, size, and color of the pin, as well as any text or other graphics that should be included on the pin.
How do you make enamel pins?
There are a few ways to make enamel pins. The most popular way is to start with a metal base, then add a layer of enamel and fire it in a kiln.
How do I make an enamel pin?
1. Drill a hole in the lapel pin back with a drill or X-Acto knife. The two holes should be opposite from one another. This is important because it will help when you are painting your design!
2. Mix three different shades of enamel paint on your palette until you get the colors you want.
3. Use your paintbrush to fill in the design of your pin! You can be as detailed or simple as you like, but keep in mind that the smaller the details are, the harder they will be to see. The enamel paint should be opaque enough so that it fills in any spaces without showing through when it is dry.
4. Take your pin to a heat source, such as a lighter or candle, and melt the top coat of paint until it is smooth and even. Make sure all spots that have extra paint are melted away! You can use a spoonful of Vaseline to help the flow of enamel while you melt it if needed.
5. Let the pin dry for several hours.
6. If your design has areas that are not smooth, you can use a small fine-tipped brush dipped in paint to touch up the details!
7. Reassemble your lapel pin back to attach it to whatever you would like (your shirt, jacket, or bag.
Can you make enamel pins at home?
Yes, you can make enamel pins at home. It's not as difficult as it may seem, but there are some steps involved. You'll need a little patience to get the hang of it if you've never made pins before. Don't be discouraged if your first few attempts don't turn out exactly how you'd like them to. Just keep at it and learn from your mistakes, and you'll be making enamel pins like a pro in no time!
Can you make your own enamel pins?
Yes, you can make your own enamel pins. All you need is some basic supplies and a little bit of creativity!
What machine is used to make enamel pins?
The machine used to make enamel pins is a die-stamping machine.
Are enamel pins popular?
Pins are popular because they're not constrained to clothes or jewelry. They're a fun way to be creative and express yourself. They give us an easy way to identify people who like the same things we do. Pins are an easy way for people to express themselves whether it's a subtle nod to their favorite anime, a reaction to politics, or just a simple design.
What is the back of an enamel pin called?
The back of an enamel pin is composed of two parts, a nail and a clutch. The nail is a thin sharp-pointed piece of metal. The clutch is the attachment that affixes to the nail to keep the pin in place.
What are decorative pins called?
Decorative pins are also called pins, brooches, or lapel pins.
How do you make pins for backing cards?
Make sure the pins will look proportional on the backer card. For example, if you have a 2in. pin, you would not want a card that measured 2in. x 2in. You would want a card at least 3in. x 3in. You can request the pins be placed anywhere on the backer card. If you have design capabilities you may mark the place where you want the nail to puncture the card with an X.
How big are pin backing cards?
We recommend 2in x 3in but they can be any size.